How to Make the Best Cafe at Home
September 03, 2025 5 min read
How to Make a Cafe at Home (2025): Easy Setup, Fresh Beans, Fast Wins
This morning I put on mismatched socks, saluted my toaster (don’t ask), and built a tiny café in my kitchen—no lines, no grumpy wallet, just happy mugs. Want the same magic? Here’s how to make a cafe at home so your day starts with the best craft coffee at home—fast, simple, and super tasty. We’ll keep it friendly, silly, and ridiculously useful, so you can order coffee online, pick winners, and brew cups that make you say “WOW,” not “why is my coffee shy?”
“Café-at-Home” Beats the Drive-Thru (and your piggy bank smiles)
Let’s tell a tiny truth: “quick” coffee runs are sneaky time thieves. You drive, you sit in a slow turtle line, you pay seven bucks, and you come home with a cup that might be awesome… or meh. When you set up a mini café at home, you control freshness, flavor, and speed. One button (or one gentle pour) and—boom—your kitchen smells like victory.
You’ll learn three big levers to make at-home cups sparkle:
-
Fresh-roasted, quality beans (know what to look for)
-
Simple, reliable gear (that you actually use)
-
Byte-sized brew steps (quick routine, big flavor)
If you want a deeper dive on shopping smarter, peek at these friendly, no-pressure reads (for later):
(All links are from the same site for easy, safe wandering.)
Your Tiny Café Blueprint (Step-by-Step)
Step 1: Claim Your Café Corner
Pick a counter spot and make it cozy—like a pillow fort for grown-ups, but with beans. You’ll want:
-
Brewer you’ll actually use (drip machine, pour-over, French press, or pod brewer)
-
Grinder (burr style if possible for even grinds)
-
Kettle (electric is fast; gooseneck makes pouring easy)
-
Scale (helps repeat wins)
-
Canister or resealable bag (keep beans sealed, cool, dry, and dark)
For help choosing beans and matching flavor lanes, this playful guide is gold:
Step 2: Pick Beans Like a Pro (but still in pajamas)
What to look for on any product page:
-
Freshness you can verify: a roast date (not just “best by”).
-
Clear roast style: light (fruity/tea-like), medium (chocolate/caramel), dark (bold/roasty).
-
Process listed: washed (clean/bright), natural (jammy/berry), honey (sweet/rounded), anaerobic (tropical/wild).
-
Straight-talk tasting notes: cocoa, caramel, cherry = helpful; unicorn moon mist = cute, not useful.
Skim these later for smart shopping and speedy shipping tips:
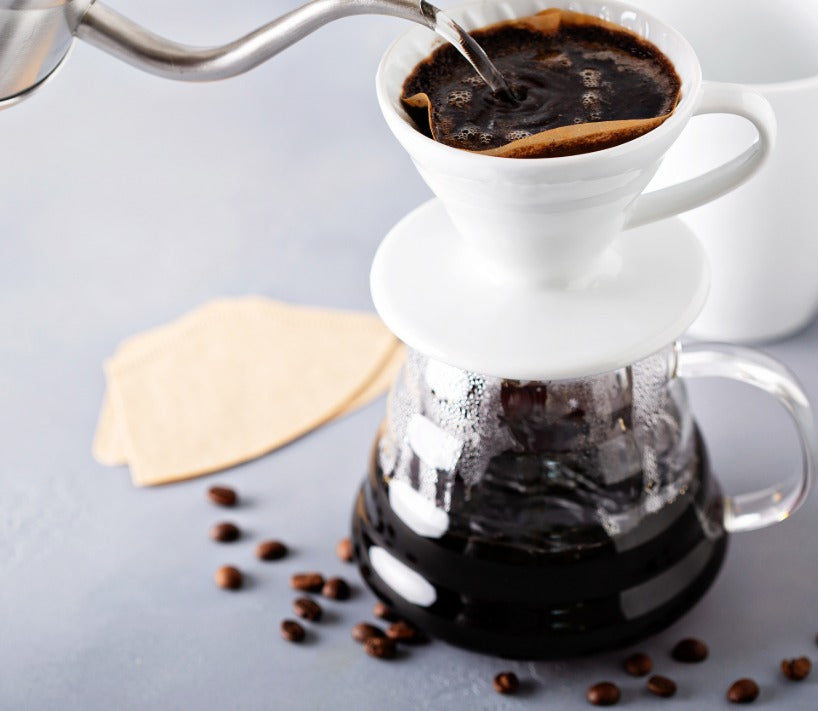
Step 3: Build Your Everyday Brew Routine (5 minutes, scout’s honor)
The “Daily Drip/Pour-Over Plan” (fast & friendly):
-
Weigh beans: start around 18 g coffee (about 3 rounded tablespoons if no scale).
-
Grind: medium for drip/pour-over.
-
Water: about 288–300 g (roughly 10 fl oz). Bring to a hot but not angry boil; rest 15–30 sec.
-
Bloom (30–45 sec): pour a little water to wet all grounds; they puff up like tiny bread.
-
Pour in circles: finish the water in 2–3 gentle pours over ~2½–3 minutes total brew time.
-
Taste & tweak:
-
Too sour/sharp → grind finer or brew a bit longer.
-
Too bitter/ashy → grind coarser or brew a bit shorter.
-
Too flat → try a lighter roast or a natural/honey process for more sparkle.
-
The “Press-and-Relax” French Press (cozy & chocolatey):
-
Coffee: 18–20 g, coarse grind.
-
Water: ~300 g just-off-boil.
-
Stir and lid: steep 4 minutes.
-
Press slowly and pour.
-
If silty, wait 30 seconds before pouring or use a gentle paper filter in a pinch.
The “Pod-But-Fresh” Trick (convenience wins):
-
If you use pods, look for fresh roast dates on the pod box too.
-
Try lighter-medium pods for fruit/clarity, medium-dark for classic chocolate/nut vibes.
For more flavor-matching and roast/process decoding (in friendly language), this guide helps:
Step 4: Make Your Flavor Lane (Pick once, sip happy)
-
Say “fruity” → Light roast + Washed/Natural
-
Say “chocolatey” → Medium roast + Honey/Washed
-
Say “smoky/strong” → Dark roast + Washed/Wet-hulled
Comparison Table: Home Café vs Coffee Shop
| What You Care About | Home Café (You) | Coffee Shop Run |
|---|---|---|
| Time | 4–6 minutes, no lines | Drive, wait, hope, repeat |
| Freshness | You pick roast date; brew immediately | Unknown roast age; brewed in batches |
| Flavor Control | You choose roast, process, and ratio | Barista chooses; menu limits |
| Cost per Cup | Lower over time (beans + gear) | Higher per visit, adds up fast |
| Consistency | Same beans, same steps, repeatable | Changes by day, barista, or shop |
| Learning | You improve fast with tiny tweaks | Not much learning—just sipping |
| Vibe | Pajamas allowed; playlist is yours | Pants required; music roulette |
Tiny Troubleshooting (because all heroes need sidekicks)
-
Cup tastes sour/tangy? Grind finer or brew a bit longer/hotter. Medium roasts can soften the zing.
-
Cup tastes bitter/ashy? Grind coarser or brew shorter/cooler. Try one notch lighter roast.
-
Cup tastes weak/watery? Add a few grams of coffee or grind a tick finer.
-
Too intense? Reduce dose slightly or grind a tick coarser.
-
Feels “flat”? Try a natural or honey process for extra sweetness/aroma—or a fresh, lighter roast.
Money & Time Reality Check (friendly math)
-
Time saved: Your routine takes about 5 minutes. That’s shorter than the time it takes your car’s seat warmer to remember you exist.
-
Money saved: Per-cup cost at home is usually much lower over a month. Beans + simple gear = predictable, tasty mornings.
-
Brain saved: You control variables, so your cup gets better every week. (Yay, science!)
Need a one-page on shopping smart so you don’t overpay for “meh”?
Your One-Week “At-Home Cafe” Challenge (playbook)
Day 1: Set up the café corner. Clean the brewer, place grinder/kettle/scale, and tidy your tools.
Day 2: Order coffee online with a roast date you can see. Pick a roast lane (light/medium/dark).
Day 3: Practice your chosen method (drip, pour-over, or press). Write down dose, grind, water, time.
Day 4: Tweak one thing (just one!). Better bloom? Finer grind?
Day 5: Taste side-by-side: yesterday’s steps vs. today’s tiny change.
Day 6: Try a new process (washed → natural or honey) to see how sweetness and aroma shift.
Day 7: Lock your favorite recipe and high-five yourself—your kitchen is officially a café.
Quick Reference: Beans, Gear, & Ratios (bookmark this)
Beans: Look for specialty signals, real roast dates, and believable notes.
Grind: Evenness matters. If your grinder has “clicks,” note your favorite number.
Water: Hot but not angry (just off boil). Clean water = cleaner cup.
Ratios (starting points):
-
Pour-over/Drip: 1:16 (18 g coffee → 288 g water)
-
French Press: 1:15 to 1:16, steep ~4 min
-
Iced/Flash Brew: Brew a stronger hot concentrate over ice (use ~60% hot water + 40% ice)
-
Espresso (if you have a machine): Start 1:2 ratio (e.g., 18 g in → ~36 g out in ~25–35 sec), then tweak to taste
Best Craft Coffee at Home FAQs
Q: What’s the fastest way to start?
A: A simple drip or pour-over routine. Measure coffee, grind medium, use hot water, and pour gently. Write down what you did so you can repeat wins.
Q: Whole bean or pre-ground?
A: Whole bean keeps aroma longer. If you need pre-ground, ask for a grind that matches your brewer (drip, press, espresso).
Q: Light, medium, or dark for beginners?
A: If you like fruit and sparkle, try light. If you like chocolate and caramel, go medium. If you like bold and roasty, go dark.
Q: What about shipping and freshness?
A: Choose best coffee bean delivery services that roast frequently and ship fast so your beans arrive inside their tastiest window.
Your “Open-Fridge” Checklist (print me, tape me, brag later)
-
Fresh roast date?
-
Roast lane matches me (light/medium/dark)?
-
Process fits my vibe (washed = clean, natural = jammy, honey = rounded)?
-
Dose, grind, time written down?
-
Water hot but not angry?
-
Taste notes recorded for next time?
PS: If your mug ever frowns, don’t. Fix one tiny thing at a time: adjust grind, tweak time, or try a roast/process that fits your taste lane better. In a week, your kitchen won’t pretend to be a café—it is one. And you built it.
Also in Best Coffee To Buy Online Education

Brewing Coffee at Home (Without Losing Your Mind)
January 24, 2026 3 min read
Sick of bad home coffee? Learn how better beans and simple steps make brewing coffee at home easy—and actually taste amazing. No fancy gear.

Fresh Specialty Coffee Online: Why Freshness Changes Everything
January 23, 2026 3 min read
Old coffee tastes flat. Fresh specialty coffee online fixes that. Roasted to order, shipped fast. Taste why freshness changes everything.

Best Breakfast Blend Online: Why a Balanced Medium Roast Wins Every Morning
January 22, 2026 3 min read
Tired of bitter mornings? Learn why the best breakfast blend online is smooth, fresh, and roasted to order. Thousands of better mornings start here.
